Salt-Roasted Candied Peanuts
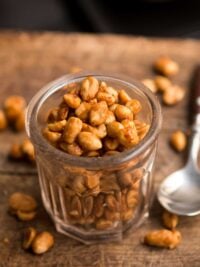
I’ll have to admit that I love peanuts, especially when they are candied with a touch of sea salt added. For years I’ve been making all sorts of candied nuts, including these candied peanuts, but this was one of the first candied nut recipes I ever came up with and I’ve been making them ever since.