Skip to content
84 Shares

Many of you have asked about my Food Photography Gear, so here’s the run-down on how I take and process some of the photos on the blog, as well as the equipment that I use. The first thing I might say is that taking a good picture is partly the camera, but it is also the person behind it. I don’t consider myself a professional photographer but I practice taking pictures all the time.

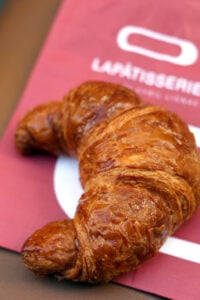
When I am shooting a recipe, I’ll consider if a technique or step needs to be shown, if there is an ingredient that is interesting (or particularly beautiful), or perhaps if the situation where I am cooking or baking something feels like a moment that I want to share. If I’m out-and-about, I will often see something at the market that looks appetizing or a pastry in a shop that stands out. Living in Paris, I’m surrounded by beautiful things and most of the time, I try to do as little as possible and just get out of the way and take the picture; a flaky croissant or crusty baguette requires no manipulation to look great.

The following is a summary of the equipment I use, as well as a discussion of what techniques I use to get the shots for the site.

Pistachio Gelato
Pistachio Gelato shot outdoors in natural light on my roof.

Cameras

For those starting out, I recommend the Canon Rebel, and I love it. It’s a great camera, and very well-priced for the features it offers. For years, this was the camera that I used and most of the pictures on the blog, that appear through 2013, were taken with my Canon Rebel. The compact size of the Rebel and weight made it easy to tote along and I was extremely happy with this camera, and I highly recommend it for folks starting out in digital photography. For the price, and quality of images, it’s an excellent choice.

In 2013, I moved up to the Canon 70D (below). I wanted to expand my options and the 70D offered a large vari-angle screen that can be moved around (helpful when using a tripod), it had a much higher ISO rating than the Rebel, allowing me to shoot in very low light situations (nights in Paris, inside restaurants, etc), features a touch screen ♥, and has WiFi capabilities. The controls are similar to the Rebel, but I’ve had to take some time to learn to use some of the new features this camera offers.

When I bought my first digital camera, I was advised to get the camera without the lens. Since the ‘kit’ lens is less than $90, I bought it. But since I bought additional lenses, I took the ‘kit’ lens off and never used it again. So I agree: Skip the kit lens and buy one of the two I list below. TheĀ 50mm 1.8 is a perfect, and inexpensive, place to start.

If you do get a Canon digital camera, or already own one, there are great online tutorials to help you figure out what all those dials and buttons mean.

For social media, such as Instagram, I use my iPhone 11. It takes better pictures than many cameras and is easy to travel around with.

Lenses

I have several lenses that I use: The Canon 50mm 1.8 is the bargain of the century and the lens I snap on my camera when I leave the house since if something happens to it, it’s not a big deal. It’s small, lightweight, and inexpensive. If you own a Canon DSLR, you must get this lens.

I often use the Canon 50mm 1.4, which is faster than the previous lens, and more expensive, but it’s very well-made and good for low-light situations due to the 1.4 lens. This is the lens I use for most of the photos on the blog.

The Canon Macro 60mm isn’t cheap, but it’s an amazing lens which I use for anything very close up. It allows me to get as close as I want to something; some cake crumbs, a drip of chocolate, or a smudge of ice cream. I labored long and hard whether to invest in a lens like this, and I use it when I want to be right up tight against something. (However ever since I got the following24-70mm lens, I don’t use the macro one very often.)

One of my favorite lenses in my arsenal is the Canon 24-70mm zoom which several photographer friends highly recommended. It’s very fast, so can be used in low-light situations, but is also quite heavy. It’s not inexpensive, but it has a wide range of uses and although the price was initially a deterrent, I’m glad I made the investment. It also has a macro function, too.

For toting my camera around, I recently discovered the Black Strap. I didn’t realize what a cumbersome nuisance the strap that came with my camera was until I tried this strap, which allows you to easily grab your camera without being tangled in a bunch of cords and straps. If you carry your camera around with you frequently, even though it looks slightly dorky, I found this to be a good item to have.

For those times I prefer to hand-hold my camera, I have this Case Logic Quick-Grip, which is less cumbersome than a strap that hangs around my neck.

Tripods

Because I tend to favor sharper images, and the lighting in Paris means I have to shoot at lower shutter speeds, I use a tripod 50% of the time. I prefer to shoot freehand, but invariably things come out a bit fuzzy if I don’t.

I have two. I have a Velbon tabletop tripod. This Velbon is sturdy, and a good value with a quick-release feature so you take easily take the camera off without unscrewing the whole thing. The downside it to tighten the camera after making an adjustment, you have to remove the quick-released platform and re-adjust the tightness.

The tripod I use mostly is the Slik Sprint Pro. This is a rock-solid tripod, easy to use and adjust and is a professional-quality piece of gear at a very attractive price. It is a great tripod and I love mine. A feature to look for a tripod is legs with clips that you can unfasten to allow you to raise and lower the tripod easily; the ones with the screw-type fasteners can be frustrating to use.

If you don’t have a tripod, prop your camera against something or rest it on a book to steady it. I do this sometimes in restaurants, since I don’t use the flash and use a slow shutter speed.

Lens Filter

Although I’m fastidious about keeping the lens cap on, it’s imperative to use a lens filter. This will prevent scratches on your lens.

Lens Cleaning

For lens cleaning, I use a microfiber cleaning cloth. Using fluids on a lens can damage it if you’re not careful, and every once in a while, I give my lens a swipe to clean off any bits of butter or caramel that may have landed on it.

Flash

roasted figs
Shot indoors, in my kitchen at night with the Canon Speedlight.

I invested in a Canon 430EX Flash. Despite my wariness to use a flash, sometimes I’m in a place like a chocolate shop or kitchen, where there’s a lot of movement and not a lot of light.

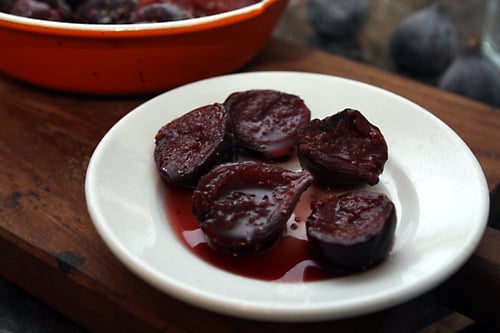
This excellent flash automatically compensates and adds just enough light to illuminate and shoot at a faster shutter speed, but doesn’t give people that “deer in the headlights” look. If you use it, simply point the light straight up at the ceiling and you’ll get a wonderful fill-in flash. The photo above, of the figs, was taken using my Canon Speedlight and doesn’t look like it was taken with a flash, at least to me. And if you live somewhere where there isn’t a lot of light, or plan to shoot during winter months when the sun goes down early, you might want to consider using one.

Tips and Techniques

food photo

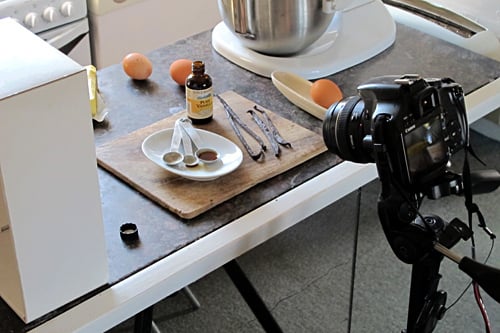
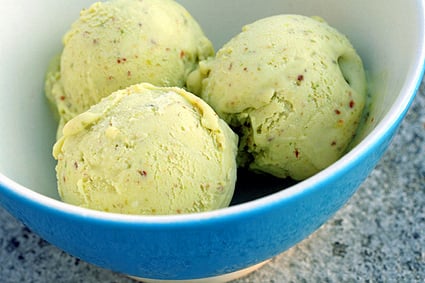
When I take photos for the site, I don’t really have a plan. I try to keep props to a minimum and use materials like plates and flatware that don’t distract from the food. For this site, the photos are part of a story and if I’m writing about ingredients or techniques or a recipe, I like the photos to correspond with the text. Keeping things simple means that people focus on whatever it is I’m shooting, such as the vanilla extract and beans, above. Depending on the time of day or the season, I’ll either shoot in my kitchen or outdoors. The Pistachio Gelato shot at the top of this post which was shot on my roof, placed in a concrete corner out of direct sunlight. The vanilla was just on my kitchen counter and I use a tripod because the low light requires a slower shutter speed.

While creating a recipe for the site, as I start cooking, I’ll take pictures of the process along with way, especially if I’m doing a recipe that might require a photo of the dessert or a particular ingredient to accompany the text. But often I do it for demonstrating techniques as well, like rolling doughs or candymaking.

Unlike cookbooks, on the site I have the freedom to show step-by-step photos, which is helpful for more challenging recipes, such as my Kouign Amann recipe. And the photos were helpful for the post I did called How to Make the Perfect Caramel, where I wanted to show exactly what stages to cook the sugar to, and to alert readers to things to watch out for.

prephotoshoppedalp.jpg photoshoppedalp.jpg
The same photo, revamped using the Levels adjustment in Photoshop.

For most entries on the site, I take 25-50 pictures, and process them in Lightroom. Lightroom is a great editing program but is not exactly intuitive, and I’ve had to take a few lessons on how to use it. (And much of it still baffles me.) A good book to learn Lightroom is The Adobe Photoshop Lightroom Book for Digital Photographers, which explains everything in everyday language.

chocolate chip cookies
Chocolate Chip Cookies from my book Ready for Dessert, shot outdoors in natural light.

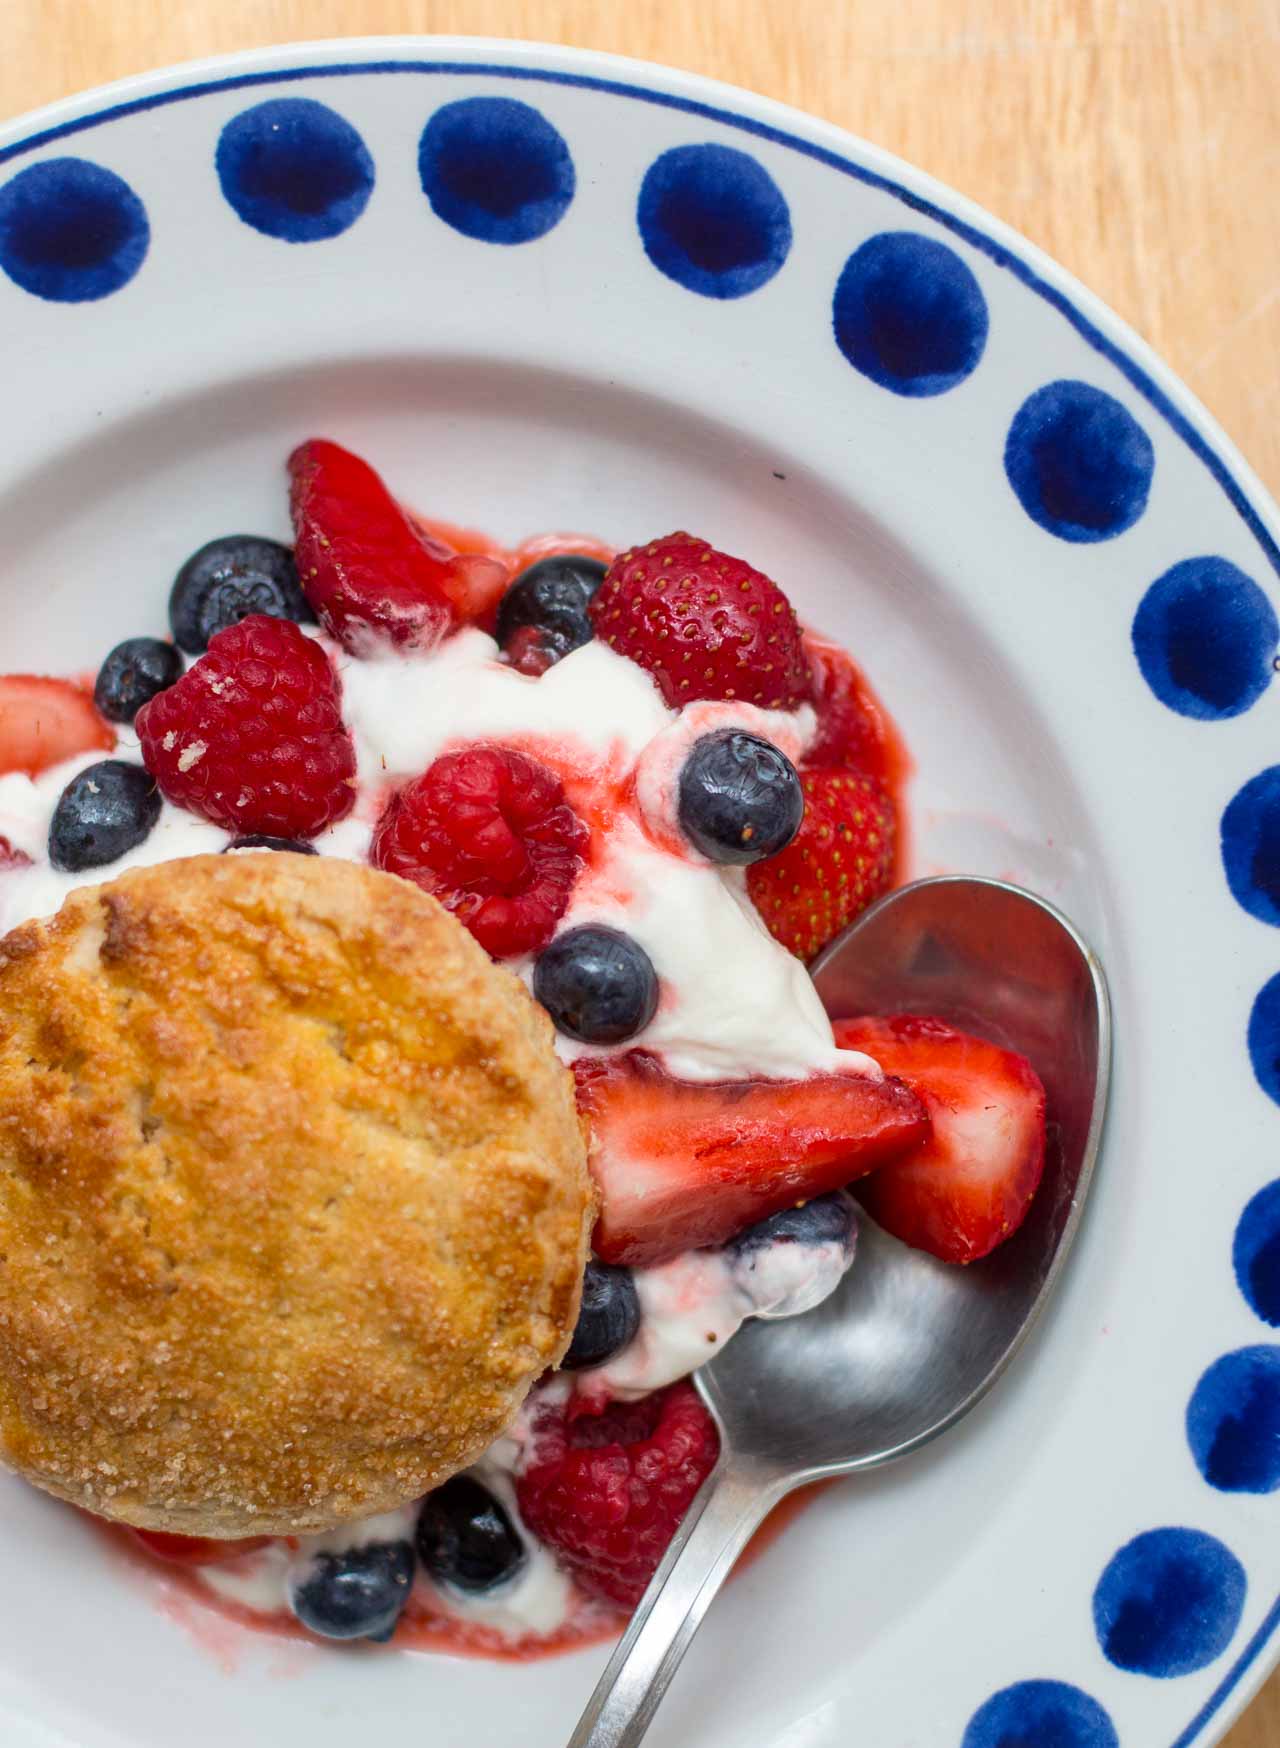
Since many people are on laptops or mobile devices, I try to keep the images close to the food, but not too close; I don’t think food should ever be bigger than it actually is. I don’t futz with the food too much; I try to stack it on a plate, or scoop it into a bowl, and just shoot it. I keep accoutrements to a minimum; I might use one utensil or a napkin alongside, as one would naturally cook or eat the food.

white asparagus
White asparagus snapped in a Paris restaurant with no flash, at ISO 800.

I usually always use my digital single lens reflex camera (DSLR), and on occasion at home (never in a restaurant), I use a Canon 430EX Flash, but as I get more familiar with my Sony a6000, I will be using that more often.

Never, ever use the flash on the camera, as it makes the photos too harsh. I almost always shoot in M (manual) mode. The gray skies of Paris mean the light is always diffused, which can be good for photos.

The last bit of advice I’ll give is to practice. The great thing about digital is that you’re free to make mistakes because they’re easy to get rid of. Below are some additional links that offer advice on various food photography topics.

Food Photography Links

Heidi’s tips are at 101Cookbooks.com

Elise shows how she does it at Simply Recipes

Deb shows her approach to food photos over at Smitten Kitchen

Lara at Still Life With is one of the most comprehensive sites on food photography

Food Photography tips from White on Rice Couple

Lolo, from Vegan YumYum shares food photography tips

Nika teaches Food Photography 101

Ree gives 10 tips from her ranch.

If you want to see how BĆ©a does it, visit her luscious site, La Tartine Gourmand

Jaden shows off digital lighting at Steamy Kitchen

Food Photography at Wrightfood

My Amazon list of favorite photo gear.

84 Shares

69 comments

    • Joanna

    Thanks SO much for this David – it’s really great to see that you can achieve so much (because your photos are consistently good) in a relatively straightforward way. Great links, too

    Joanna

    • Kalyn

    Great post. I have the same camera and am still trying to figure out all the dials and buttons!

    • Ann

    David – cannot thank you *enough* for this post since I always appreciate it when people post their photo tips. It’s always so fascinating – and I learn something from every one of them. Love the tip about a simple piece of styro for backfilling the light – perfect. Just curious – instead of aperture priority, how come you don’t just use manual? What I find w/ aperture priority is that my shutter speed just doesn’t always do what I’d like it to do. GREAT post, thank you. Best, Ann Langlois

    • Alanna

    Off to the basement to check for styrofoam, thank you! Just FYI even point and shoot cameras often allow measuring white balance — since learning that from Lara/Bea last summer at the BlogHer conference, I can shoot inside with just kitchen lights with reasonable results — not as good as natural light but really helpful when the days are short or the weather especially dark/gray.

    • Carrie

    Your food photo set-up looks a lot like mine. ;)
    I take most of mine on top of my dryer next to the only window in my kitchen and use the back of a shiny cookie sheet to bounce the light.

    • Kim

    Thank you, I really appreciate you taking the time to share your expertise on photography in addition to food. I love the photo part of this process, am signed up for some local classes and will be sure to go over your information again and again.

    • cybele

    Excellent stuff. I was wondering a little about your use of natural light.

    Most of all, the white balance tip is essential. It’s amazing how dead the same photo can look with an off balance image. (Luckily it can usually be rescued in Photoshop.)

    • nyc/caribbean ragazza

    These tips are great. I bought my first digital camera last year (a Canon) and I am still learning how to use it.

    • judy gal

    It’s SUCH a treat to hear about your photography and equipment, David. Since your shots are so impressive and your input is so direct, I’ve saved it with my ‘really good stuff about food photography’. As one who always has a camera nearby, I applaud your information and advice!
    Thanks so very much!

    • Jessica

    Thank you for this excellent post, David! How timely, in that I just asked you about this on one of your Flickr photos last night. :-)

    • David

    Jessica: Yes, I’ve been tweaking this post all week, so thanks for the kick in-the-pants to go ahead and put it up!

    Kalyn & nyc: Do take that free online tutorial; it’s a pretty painless way to figure out some of those dials and numbers.

    Carrie: That’s funny, since my set-up (in the photo) is on top of my “dryer” too!

    • kathryn

    David, I think you mean the 50mm not 55mm, as you have written. Since you (and others) are using a Digital Rebel, I think you should probably make note that this lens is pretty telephoto and the field of view may be too narrow for some. Also, for the 50mm, the the minimum focusing distance is on the longer side. If you are coming from a point and shoot camera, this can be an awkward realization. For example, if you are doing food photography at your seat in a restaurant, you may have to push the dish further away or get out of your chair. If you are doing food photography at home, you may find that you can’t do a good close-up, and need to back up, or else the lens won’t auto-focus.

    Ann, do you shoot with a tripod? David can “get away” with using Aperture Priority, since his tripod allows a MUCH slower shutter speed. If you’re shooting handheld, you usually don’t have that luxury, unless you can hold absolutely still as a rock!

    Oops, yes, it is a 50mm. I’ll change that. Thanks…That fixed lens does have some restrictions, but I’ve used it in restaurants (including the soufflé shot above) without problems. The size and weight makes it easier to transport than a telephoto even though you can’t get as close as you can with a Macro. I know when you get started with lenses, it’s hard to stop! ~ david

    • Casey

    This is so incredibly helpful, particularly for a photography moron like myself. When I started my blog I thought, “This is going to be about words, not photos,” but one tends to get a bit embarrassed by crummy pictures and resolves to improve. (When a friend e-mails you: “Darling, send me your flickr password and I’ll try to improve that recent photo,” you know it’s time to plunge in and learn the rudiments.

    • jaden

    We must be blog-bonding as I also use Rebel XT, 60mm macro, 50mm 1.8 and just bought the 430EX flash (still in box, haven’t used)

    Thought lately I’ve been eating a lot of goji berries and it must be clouding my judgement as I want a BIGGER, MORE EXPENSIVE camera that honestly, I don’t really need.

    For the website, I use my 60mm macro quite a bit. For the cookbook, I’ve been using the 50mm 1.8 almost exclusively because of the cookbook page dimensions (I need to leave room for cropping to 9×10) With the 60mm macro, I kept pulling back so far to get more into the photo that I ended up halfway across the room – so the 50mm works better.

    $1,000 per photo!?!? DAMN. I’m in the wrong business. Maybe I need to really hone my food photography skills and be a professional food pornographer.

    • David

    Glad many of you are finding some useful information in this post. I guess those 17 hours in a crummy hotel in an industrial park near Chicago O’Hare weren’t a total waste of time : )

    Jaden: Yes, I haven’t unwrapped my flash either. I’m kind of scared of it.

    The $1k per photo is based on a photographer that has a studio and kitchen, with assistants (unless you’re paying those kids, they won’t count if you want to start charging.)

    Plus there’s studio staff, food and prop stylists, and the all-important Waiter’s On Wheels delivered lunch—when you’re shooting a dessert book, you don’t really feel like having chocolate cake for lunch. Well, most of the time you don’t. We always saved them for the end of the day!

    • kayenne

    thanks for the article, david! i’m not a food photographer per se, but i do work as a food stylist and this helps a lot when i talk to the photographers. the ones i usually get to work with normally shoots weddings and fashion… so this helps. any other food styling tips?

    • pam

    I struggle with knowing how to resize my photos. Do you resize before putting on flickr, or on your blog?

    hi Pam: Because my blog has a specifically-defined area of width for photos, I re-size them in Photoshop before uploading them to Flickr.

    There is a basic editing tool in Flickr that allows you to re-size pics (and apparently a better one you can upgrade to), as well as Flickrs pre-set sizes, but they don’t correspond to the width of my blog.~dl

    • mimi

    unfortunately i do all my cooking and baking at like 10pm … natural light comes in the form of a Lowel ego light (which i’m still trying to get used to). thanks for the great tips, and links.

    I have just started using Rebel XT and the 60 macro. if my photos aren’t up to snuff it certainly can’t, um, can’t be the camera’s fault! ;)

    • Marni

    All of your photos are amazing, the ones you do yourself for your blog, and the ones in your books done by others (I have every book). You make it very tempting to try all your recipes.

    In fact, my friend came over last night and pulled your ice cream book off my shelf, flipped through all the photos utterly amazed by everything, and on this hot Los Angeles night, we decided to make your mango sorbet. INCREDIBLE!!!!!!!! The two of us pretty much finished up that 1.5 quarts! But not to worry, I have more mangoes, so I plan to make this again within the week…

    • Vitor Hugo

    Second person who has a Canon Rebel for food photos, heheh. Ok, I’ll buy it… but only next year, so sad. =(

    Thanks, Monsieur Lebovitz for the tips! :)

    • Dana Mccauley

    This is great info. I also have a Canon rebel and I find i a bit heavy so I use a tripod a lot as well. But, since I’m lazy that means I don’t use my Rebel that often and use my Canon Elph most of the time.

    You are inspiring me to be more fastidious since now that I know we use similar equipment I have to admit that if I actually 1. used that equipment, and 2. took a bit of time to study your tips, that I could do a lot better with my photos.

    Thanks David!

    • Khursten

    Wow! This is really helpful David! As well as the photography links that you have.

    I don’t have a swanky camera like yours, but now I’m thinking about investing as well. :3

    I read in a magazine not to use levels because it destroys the color composition at some point. To get crisper pictures, use curves instead. It’s trickier but it’s nice when you want to draw the colors out. :)

    • David

    Victor: When I bought my Rebel, it was twice as expensive as they are now. Since you’re in Europe, if you can get someone going to the US to pick one up for you, that’d bring the price down to less than $300. America’s on sale! : 0

    Khursten: Yeah, a photographer friend said to use ‘curves’ instead of other features, but I haven’t been able to take the time to figure that out.

    That’s another thing to add to my list of things to do around here…

    • Jeannie Crockett

    Hi, David. Very interesting–your photos are always wonderful.

    I have a question for you, too. We are invited for a weekend in Brittany at the home of an acquaintance of my husband. We have brought a gift for him from the States, but I know I should take a hostess gift as well. What do you suggest from Paris?

    Everytime I walk through the Marais I look for you!
    Thanks for WTF, too! Great giggles….

    • Lucy V

    Hey David,

    I totally agree with you about the Rebel kit lens, I shot with the one that came with my Rebel for years and didn’t update it until recently, and there’s a really big difference. Thanks for sharing your ideas and tips!

    • RecipeGirl

    I’m always glad to see a post about food photog. tips. Natural light is my best friend. There’s a little corner of my kitchen table that I use, and when it’s the right time of day I can get some really perfect shots. I have the light setup that Jaden mentions in her post, but I don’t use it often. Natural light just works best.

    My camera is a Fuji SLR and I’m really happy with it. I went to look at the Rebel the other day and the sales guy told me that my camera was as good or better than the Rebel. So now I need to invest is a super macro lens as you mentioned!

    • David

    RecipeGirl: One thing to know about buying specialized (and pricey) lenses and that they don’t often fit other brands, so you’re kind of stuck. I know the Canon line, the EOS lenses only fit their digital cameras. Happy snapping!

    Jeannie: A box of Parisian chocolate is always appreciated. There’s some suggestions if you click on my category box, up on the left, under Paris & France: Chocolate.

    • Anna

    What a useful post! thank you.

    • brian

    Hi David, Great post. I’m always curious about how other folks do their photography and looks like you have a good roundup of other bloggers, too. I originally got a 50mm lens (still have it) but I do so many ‘action’ cooking shots I found that I could not look through the viewfinder and stir a the same time. In fact, for some shots, I would have had to hold/position the camera above and behind me to get everything I wanted in the photo. I’ve since adopted a wide angle zoom to let me stay in the kitchen while I cook, and save the 50mm for pure posed shots. I swear by a tripod and my family is used to being careful not to trip over it when it is in the kitchen!

    • Janet

    David, such a good use of your layover time. I appreciate your including us. Now I need to practice.

    • Food Librarian

    Thanks for this great information! I’m about to blow my “economic stimulus” check…and you gave me some great ideas!

    • David

    Food Librarian: Well, I’m going to blow mine in France. I’m sure President Bush would be happy to know he’s stimulating the French economy, too.

    Um…right?

    • Christine

    Are you concerned at all about people stealing your photos off your blog or flickr? They’re such great photos that I thought for sure you’d have a watermark of some kind.

    • David

    Christine:

    Yes, that is a problem.

    I saw a picture of mine on another person’s blog, and his partner is a professional photographer! You’d think people would know better.

    I’d like to think it was an oversight…but it’s pretty sad if people can’t take their own pics. Why blog if you’re not going to do it yourself?

    There’s a lot of great blogs out there with modest photos; that’s part of their charm. I don’t like watermarks and assume that 99.9% of the people are honest.

    The other .01% will have to answer to a higher power someday…someone higher, and scarier, than me.

    That’ll teach ’em…

    (There’s an Invisible watermarking thing I just read about, via Alanna, for anyone interested.)

    • Patrick

    Hi David,
    You can achieve some of the controlled studio lighting with a basic $10 DIY photo studio made of cardboard and white tissue paper. Directions here. There’s a lot of great and easy tips for manipulating lighting in the Strobist blog that should come in handy.

    • krysalia (france)

    I have the 60 macro lens too, and I totally agree with you: Ii couldn’t live without it anymore : )

    • Lyra

    What a useful post. I love to hear what other bloggers/photographers are doing and I am currently thinking about buying my own DSLR (I actually don’t own a digital camera at the moment, I just use my boyfriend’s for my blog). Thanks for the roundup of tips as well!

    • K

    Thanks (again) for sharing all the tips, this is good stuff. Going to drool over the Rebel XTi now …

    • Craig

    Thanks Dave. Do you do any color balancing ? Your meter must be right on if you don’t do any color adjusting. Most people that use natural light have photos that are too blue; yours look good.
    I could tell you the benifits of the Curves command over the Levels, but it would start getting geeky.

    • David

    Hi Craig: No, I only do Levels or Auto Color. Yes, I wish I understood 99% more of Photoshop. Oh, the things I could accomplish…

    • Abra

    Thanks for this excellent post! It ought to make my French Letters photos take a great leap forward.

    • Andrew S

    Christine wrote: “Are you concerned at all about people stealing your photos off your blog or flickr?”

    They can’t “steal” the photos. People can copy them, but that’s not the same as stealing…stealing would mean that I don’t have my photos anymore. I’m happy to have other people use my photos (as long as they’re not making money off of it without giving me a cut!).

    David, your food photos are excellent, even compared to photos from professional photographers. Keep up the great photography (and writing).

    • David

    hi Andrew: Good points, but if someone takes your idea for, say…a self-unloading dishwasher, and builds it, some consider that theft of some sort.

    I was/am embroiled in a situation where someone used a specific recipe almost exactly from a book of mine, with a very minor change—and won $100,000 with it.

    (Unfortunately I wasn’t offered a cut, nor did the magazine wish to credit the book!)

    I let people use my Flickr images, as long as they ask first, if it’s for non-commercial use or for a product or service I support. Asking is always the best solution. Glad you like the photos~just wish I had more time to learn Photoshop tricks : )

    • debbie

    David,
    This is so extremely helpful! My husband and a handful of friends are really getting into photography and they’d love to read this! Thanks so much for sharing. I love your blog, I don’t recall a single time that I’ve read an entry and didn’t laugh out loud or get really inspired by the beautiful photos.

    • Joe

    David,
    I love your information, really useful for a budding food photographer

    • Heather

    How much do you charge for your photo shoots?

    • Lynn (www.mamasays.us)

    WOW. Your photographs, tips and advice are fabulous. Thank you for sharing.

    • Nurit – 1 family. friendly. food.

    I love this page, especially the photography advice. I keep coming back to this page.

    • Mackenzie

    Hey i have a few questions. Would you mind answering them?

    1) How and why did you become involved with this photographic career?

    2)What do you consider to be the hardest part of your job? The most fun?

    3) What advice would you give someone interested in your career?

    • Fernando

    Wow…! your blog is just not only informative but beatifully presented, congratulations David, and thanks for share your good taste and expertise with readers like me.

    • deborah d. lattimore

    Thank you for sharing the tips about your wonderful photography. I have used the XT for several years now, with a 60mm and 50mm (& the 100-400mm for surfing photography is so much fun!) but now I use the G9 because of the portability issue. I always take my Holgas and Polaroids with me, so I wanted to cut down on all the weight. I love the G9’s 1cm macro capability, although it definitely lacks the wonderful depth of field of the 60mm on the XT. I also love the time-lapse feature, which is not included in the G10. I’m coming to Paris in October and bringing the G9, tripod, two Holgas (one for new film, one for expired film) and a Holga with Polaroid back, but thinking about bringing the XT with the 50mm and 60mm is so tempting. Your website has really helped me plan my trip and dream about Paris every day. Je vous remercie! Deborah

    http://www.deborahlattimore.com

    • Paul Richardson (getmecooking.com)

    Very good and interesting article.

    Do you ever connect your camera to your mac in order to get real-time views on your photographs? I know you can see them on the camera display, but that is not as nice as seeing them on a monitor.

    • David

    I don’t because I mostly shoot in the kitchen when I’m cooking, and prefer to be untethered! I know professionals do that, but I’m not that organized…

    • J2Kfm

    thanks for the tips.
    I’m considering to move up to DSLR, but not sure of which one yet.
    currently using Panasonic Lumix LX3, which is good enough in most situation. seldom use the SCN mode – Food though, so it compensates the yellow-hued lighting?
    thanks for the info. I constantly shoot on A mode as well, for excellent bokeh effect, and low-light usability.

    • Alan De Herrera- Orange County food photographer

    Great blog! I also use two Canon Rebel XTi’s but need a 60mm macro. Thanks for the info!

    • Rob Folendorf

    Thanks for the advice, David. I’m a weaver and always need the color to be as accurate as possible. I’ve depended on my little Lumix DMC-FX8 and iPhoto for years, as my websites shows. Now I’m ready to upgrade and Elements sounds great as does the newer Lumix.

    • Michelle

    Dear David,
    I subscribe to Elise’s blog and came across your site via her site! I’m a Korean girl who’s now married to a native Parisian hubby. We both live in the States now, but plan to move to Paris in a few yrs. I enjoy baking and love trying out different recipes I found online. I appreciate good fromage (not the over-processed sliced cheese!) and savory, yet delicate French pastries. Your site has been one of my favorites!! What a great inspiration! I can’t wait to see your new book coming out. I’d LOVE to see you sometime in the future.. Will you be having any book-signing tour in NYC? Oh, I heard that you love Korean food. Did I tell you that I make the best kimchi and bulgoki (using my secret family recipes)? ^.^ Best wishes for the exciting new year!

    • alissa

    Dear David,
    so far i have been a silent admirer of your blog and work!
    This blogpost has been a great big help to me – thanks for that so much!
    All the best in 2010
    Alissa

    • Sinful Southern Sweets

    Thank you a million times over. I have been up since 4 am (its 7 now) trying to research better food photography tips. This post was exactly what I was looking for! I cannot believe I have never seen this as many times as I visit your site (on a daily basis, usually).
    Thanks again!

    • hahahane

    Your blog has my three favourite things: food, photography and Paris. Couldn’t ask for more! When you take pictures in restaurants, do you ask for permission first? Thanks!

    • David

    Hahahane: I don’t ask first, but I never, ever use a flash, and only take a picture if I think it’s not going to bother the people who work there or those around me. I usually pull out my camera, take a quick picture or two, then put it away. I’ve never had any problems but I do try to be unobtrusive, and as polite as possible, and am conscious that I’m in a privately-owned establishment.

    • Eleonora

    I was fantasizing about getting a better camera (I shoot with a digital compact, cough) and while perusing your site I came across your wonderful advice. Your photography has been such an inspiration…
    Merci!

    • Magda

    If I could only take such good pictures of my food… everything you shoot looks so real, my photos look so different that the real thing, I hate it. Have to invest in something better :)

    • bunkycooks

    Thank you so much for the photography tips! It is always helpful to see how other bloggers do their photos and what equipment they have. I totally agree that it just takes practice and lots of it! I have the right tools, I just need to work at it. Your photos always look great and I like that you take a minimalist approach to what you shoot (in the food pics).

    • adrian

    Hi David,

    Thanks for all the information here! I am thinking of finally adding a decent digital camera to my “collection” and find the Lumix LX3 interesting. Are you happy with it? I think I read somewhere in your tweets that it could be a bit more user friendly.

    I don’t really want to buy a DSLR because I am very happy with my old SLR, but what you said about your Rebel made me think again.
    I think you mentioned it somewhere else on your site, but I can’t find the information: Do you know what the Rebel is called in Europe (or Germany)?

    Oh, do you by any chance have any experience with the new Olympus PEN cameras?

    Thanks again!
    Adrian

    • David

    I have not used the PEN camera, but I don’t use my Lumix camera much, since I prefer the quality of my Canon DSLR and find it worth carrying. Perhaps you can contact Canon and find out the European equivalent of their camera models as I don’t know that information either.

    • Sherri

    Thank you for sharing your photography approach. I realized that to be fair to the visitor, I needed to step up my photography – yes I started with an iphone, but soon realized it was blasphemous. I especially appreciate the comments on the process. I have burned many foods trying to get the right shot. Thanks, love your site.

    • Jan

    Hi David. Well, I’ve tried several of your recipes and have to admit that I am now a big fan. I’ve tried the Racine’s Chocolate cake (yum) and the Irish Shortbread…both excellent. Thank you. Recently, with a big crop of Swiss Chard from my garden, I tried the Swiss Chard tart recipe. What an interesting and delicious item! I was a little skeptical when after reading the recipe I noticed that the dough has no butter in it (just olive oil) but it was fantastic! Have you ever used this dough for any other desserts?

    I live in the Bay Area and I love to visit Paris, so I will be signing up for one of your chocolate tours when I’m there next. Also, enjoyed reading The Sweet Life in Paris. Great job on the blog, your photography and all the fabulous recipes you so generously share.

    • Ken Romero

    Love your writing and your photography is excellent.

    Hope it’s ok to recommend a YouTube channel by Joanie Simon. She is a food photographer in Arizona and works with Lightroom quite a bit.

A

Get David's newsletter sent right to your Inbox!

15987

Sign up for my newsletter and get my FREE guidebook to the best bakeries and pastry shops in Paris...