April 2008 archives

Teo Gelato

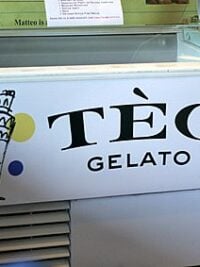
Every time I go to Austin, it seems like I’m running into town, doing a class, then racing on to the next city. So this last time, I slipped in under the cover of darkness, and arrived a day early. Sure I wanted more time to gorge on Texas bbq and Mexican food.

But what I really wanted to do was spend some time at Tèo, lapping up gelato.

Teo Gelato

The Lee family has become, I’m sure much to their chagrin, part of my extended family. Or more likely, I’ve become part of theirs. I’ve known Matt Lee’s mom for years and when she told me her son owned an authentic gelato parlor, I dialed my lawyer and had him draw up the adoption papers.

Let’s hope they sign.

Teo cappucino

Matt, aka Matteo…aka, Tèo…learned his craft in Florence at Vivoli, and his gelato is the real deal. You won’t find him in the back dumping mixes into a machine.

Continue Reading Teo Gelato…

I’m Twittering…

…and it’s kinda fun


    My Food Photography Gear

    Many of you have asked about my Food Photography Gear, so here’s the run-down how I take and process some of the photos on the blog, as well as the equipment that I use. The following is a summary of the equipment I use, as well as a discussion of what techniques I use to get the shots for the site.

    Pistachio Gelato
    Pistachio Gelato, shot outdoors in natural light, on my roof.

    Cameras

    I use a Canon Rebel, and I love it. It’s a great camera, and very well-priced for the features it offers. There are biggest DSLRs, but the Rebel’s compact size and weight makes it easier to tote along and I prefer to carry a lighter camera.

    412bsbUXyBL._SL160_AA160_.jpg

    If you can do one thing to improve your photography, it to switch to a digital single lens reflex (DSLR) camera, like the Rebel. People frequently ask what they can do to improve their photos and that’s the number-one tip I give to everyone. The ability to increase the ISO (the “speed”, so you can shoot in low light without a flash) and adjust the white balance, I find helps my photos immensely. Plus the quality of the lens means you’ll create photos much better than you can with a point-and-shoot camera.

    When I bought my first Rebel, I was advised to get the camera without the lens. Since the ‘kit’ lens is less than $90, I bought it. But since I bought additional lenses, I took the ‘kit’ lens off and have only used it once in two years. So I agree: Skip the kit lens and buy one of the two I list below. 50mm 1.8 is a perfect, and inexpensive, place to start.

    If you do get a Canon digital camera, or already own one, there a great online tutorial to help you figure out what all those dials and buttons mean.

    41bhnWd8nAL._SL500_AA280_.jpg

    A recent purchase was a Panasonic Lumix LX3 camera. This camera is small enough to slip into my pocket, although due to the high-quality Leica lens, it’s a bit thicker than a normal point & shoot camera. It does have a very fast lens, a 2.0 and image stabilization, so I can take pictures in low light situations, like in restaurants.

    It also has a variety of automatic settings, including one for “food”, which compensates for variable lighting and other situations, particularly in restaurants. The downside is that the dials move easily when stashed in a pocket or bag, and it has a lens cap, as opposed to other point and shoot cameras, which have retracting lens caps.

    I took a Canon G Series out for a whirl to see if I’d like it. I wanted a camera that was slimmer and more portable than my Rebel. While this camera has all the same great features of a DSLR, I felt a bit limited by it since I’m used to my camera. But perhaps I should’ve given it more of a chance. If you want something portable that you can slip in your pocket, but with the features of a bigger camera, this might be a better bet for you. But I chose the Lumix LX-3, listed above, instead.

    Lenses

    I have several lenses that I use:

    51E598Y8GZL._SL160_AA160_.jpg

    The Canon Macro 60mm is my baby. It isn’t cheap, but it’s an amazing lens which I use for almost all of the photos on the site. It allows me to get as close as I want to something; some cake crumbs, a drip of chocolate, or a smudge of ice cream. I labored long and hard whether to invest in a lens like this, and now, I can’t imagine life without it.

    31xgB85kY5L._SL500_AA250_.jpg

    The Canon 50mm 1.8 is the bargain of the century and the lens I snap on my camera when I leave the house since if something happens to it, it’s not a big deal. It’s small, lightweight, and inexpensive. If you own a Canon DSLR, you must get this lens.

    canon1.4lens.jpg

    I sometimes use the Canon 50mm 1.4, which is faster than the previous lens, and more expensive, but it’s very well-made.

    Canon 24-70mm lens

    And a recent purchase was the Canon 24-70mm zoom which several photographer friends highly-recommended. It’s very fast, so can be used in low-light situations, but is also quite heavy. This is an incredible lens. It’s not inexpensive, but it has a wide range of uses and although the price was initially a deterrent, I’m glad I made the investment.

    Tripods

    Because I tend to favor sharper images, and the lighting in PAris means I have to shoot at lower shutter speeds, I use a tripod 50% of the time. I prefer to shoot freehand, but invariably things come out a bit fuzzy if I don’t.

    I have three. One is a vintage Bilora, made in Germany, which is incredibly sturdy and built like a Mercedes-Benz, which I found at a flea market in Paris for 20€. The downside is since it’s older, it’s a bit more awkward to use, so I sometimes use my Velbon tabletop tripod. The Velbon is sturdy, and a good value with a quick-release feature so you take easily take the camera off without unscrewing the whole thing. The downside it to tighten the camera after making an adjustment, you have to remove the quick-released platform and re-adjust the tightness.

    The tripod I use mostly is the Slik Sprint Pro. This is a rock-solid tripod, easy to use and adjust and is a professional-quality piece of gear at a very attractive price. It is a great tripod and I love mine.

    If you don’t have a tripod, prop your camera against something or rest it on a book to steady it. I do this sometimes in restaurants, since I don’t use the flash and use a slow shutter speed.

    Lens Filter

    Although I’m fastidious about keeping the lens cap on, it’s imperative to use a lens filter. This will prevent scratches on your lens.

    Lens Cleaning

    For lens cleaning, I use a microfiber cleaning cloth. Using fluids on a lens can damage it if you’re not careful, and every once in a while, I give my lens a swipe to clean off any bits of butter or caramel that may have landed on it.

    Flash

    washing spinach
    Shot indoors, at night, with the Canon Speedlight.

    I recently invested in a Canon 430EX Flash. Despite my wariness to use a flash, sometimes I’m in a place like a chocolate shop or kitchen, where there’s a lot of movement and not a lot of light.

    41br1sHz8OL._SL500_AA280_.jpg

    This excellent flash automatically compensates and adds just enough light to illuminate and shoot at a faster shutter speed, but doesn’t give people that “deer in the headlights” look. If you use it, simply point the light straight up at the ceiling and you’ll get a wonderful fill-in flash. The photo above, of the spinach, was taken using my Canon Speedlight.

    Tips and Techniques

    blogphotosop

    When I take photos for the site, I don’t really have a plan. Initially I was doing a lot of photos indoors, using a set up such as the one shown above, shooting near a window to diffuse the light, and using a piece of cardboard or styrofoam to remove shadows and even out the light. Recently I’ve been more keen to the idea of shooting outdoors, such as the Pistachio Gelato shot at the top of this post, which was simply shot on my roof, in a concrete corner, out of direct sunlight.

    While creating a recipe for the site, as I start cooking, I’ll take pictures of the process along with way, especially if I’m doing a recipe that might require a photo of the dessert or a particular ingredient to accompany the text. But often I do it for demonstrating techniques as well, like rolling doughs or candymaking.

    Continue Reading My Food Photography Gear…

    The Pâtisseries of Paris: A Paris Pastry Guide

    parispastryguidebook.jpg

    I’ve been reading through a nifty, new guidebook to the bakeries, chocolate shops, and tea salons, called The Pâtisseries of Paris. This handy little book is full of great addresses and tips, and is just small enough to slip in your shoulder bag when hitting the streets of Paris, should you come to Paris on a mission for sweets.

    I was surprised at how in-depth this guide takes you. Naturally, the usual suspects, like Ladurée and Stohrer, are in there. And chocolatiers like Jean-Charles Rochoux and Patrick Roger are always a stop whenever I’m on the Left Bank, so I was happy to see the nods toward them.

    There’s few places that aren’t worth the trip. Such as Au Panetier bakery, where the dry cookies don’t make up for the glorious art nouveau tilework.

    Continue Reading The Pâtisseries of Paris: A Paris Pastry Guide…

    My Killer App Candied Peanut Recipe

    candied peanuts

    Let’s get right to the point: this is my killer app recipe, the one I go to more than anything else. I could tell a million stories about this, but I’ll just skip all that stuff for now and scoot right to the goods.

    I love these peanuts! Not only are they absolutely scrumptious and the easiest candy you can make, but if you keep a sack of raw almonds or peanuts on hand, you can make them in about 10 minutes. Tied into a little sack, they’re a great hostess gift in lieu of a bottle of wine (and cheaper!), and I serve them often as a cocktail snack, or after dinner, in a bowl for everyone to dig into.

    candied peanuts

    I also like to mix these candied peanuts in just-churned ice cream, which I’m going to do with this particular batch, along with a swirl of homemade dulce de leche. A handful chopped and sprinkled over a spinach salad or batch of cole slaw would be pretty terrific, for those looking for savory apps. And at the risk of infuriating any purists, topping a bowl of Asian noodles.

    Continue Reading My Killer App Candied Peanut Recipe…

    WTF x 3 (or 2+1)

    1. A few weeks ago I went back to Exceptions Gourmands with a friend from New York.

    The two women working there were quite nice and helpful, and my friend ended up picking out a few things to buy. The amount was something like 7.53€. So my friend opened her wallet and handed over a 10€ bill.

    “Oooohhh,” the saleswoman said, eyeing the lone bill laying on the counter. “Do you happen to have exact change?” she asked.

    Continue Reading WTF x 3 (or 2+1)…

    Vegetarian Restaurants in Paris

    This guest entry is from my friend Gideon Ben-Ami, who graciously stepped in and wrote this post about vegetarian dining options in Paris..Enjoy…dl

    carrot.jpg

    A you can imagine, being a vegetarian in Paris can be a challenge. During my 5 years in Paris I’ve witnessed many die hard veggies succumbing to the sins of the flesh. The usual excuse is that it’s just too hard (or the temptations too great) in the self-proclaimed food capital of the world. “I never ate meat till I tried the duck,” one friend told me while another announced, “Technically I’m still a vegetarian, though sometimes I do eat steak.”

    If you’re dining at a neighbourhood bistro, you’ll probably get by okay if you eat fish. But if you’re vegan, then you might need to smuggle in a nut cutlet or two under your raincoat as you’ll soon get tired of munching on side salads. Unlike many other European capitals, restaurants here don’t necessarily have a vegetarian option on the menu.

    Paris does, however, have its fair share of vegetarian restaurants.
    Are they any good?

    Continue Reading Vegetarian Restaurants in Paris…

    Parisian Prune Desserts

    Chocolate & prune
    Chocolate-Prune Tiramisù

    Skip the chocolate, I’ll take prunes.