How to Make the Perfect Caramel
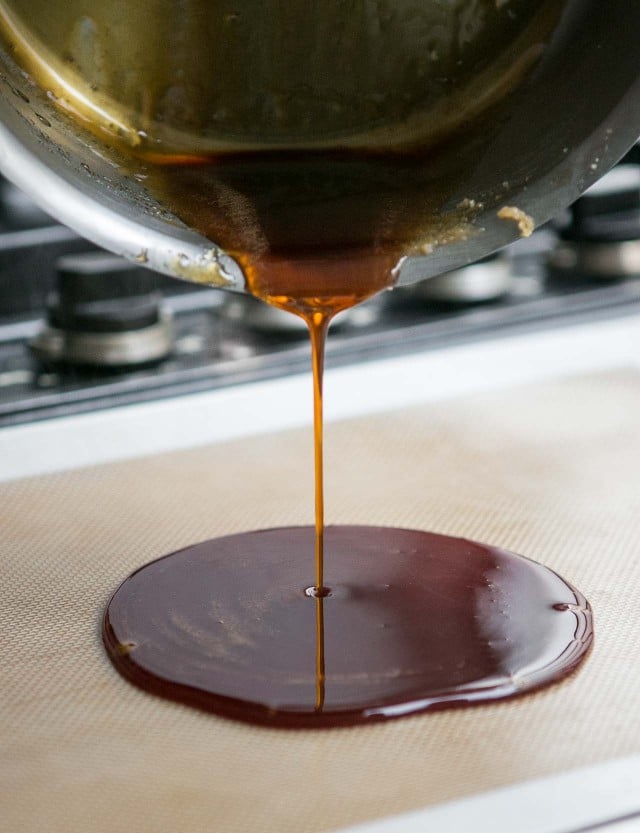
Making caramel is easy! You’re simply melting sugar and cooking it until it darkens to just the right color. And that’s it. simple, right? Yes, it is, although some have told me they are afraid to make caramel so I thought I’d offer some tips, advice, photos, and encouragement, to make your own caramel. For additional information, you may also wish to read Ten Tips for Making Caramel.
Dry versus Wet Caramel
First up, there are two different ways to make caramel. A wet caramel is where the sugar is melted with water then cooked until it caramelizes. And a dry caramel, where the sugar is cooked by itself until it liquefies, then caramelizes. A dry caramel works because sugar is mostly water and heating it will liquefy it. (People often want to reduce sugar in cake and cookie recipes, but it’s important to know that sugar makes things moist. Sugar also inhibits freezing, which makes ice cream scoopable.)
For our purposes here, I’ll be talking about making a dry caramel, which is less-temperamental than a wet caramel, but some of the same rules apply, including knowing when it’s done. The most important thing to monitor when making caramel is to cook it to just the right color and flavor. Undercooked caramel just tastes syrupy and burnt caramel tastes burned. So you want to get it to just the right point between the two.
People have asked me about using a thermometer. I once used a probe thermometer and blew out the device. So I think it’s better just to learn to rely on your nose and your eyes. After you’ve made caramel a few times, you’ll get the hang of it and know when the color and flavor is just right.
Because you’re dealing with very hot sugar, that’s sticky, here are a few safety precautions to take:
– Be careful about getting your hands anywhere near molten sugar. You may feel more comfortable wearing oven mitts and a long sleeve shirt. Caramel is hot and can splatter, especially when adding other ingredients to it.
– Use a sturdy large pot or pan if adding liquid ingredients to the finished caramel, which can bubble up and overflow. Use a pan bigger than you think.
– Keep a deep bowl of icy water nearby to plunge your hand into if a bit of caramelized sugar lands on it.
– Resist the urge to taste the hot caramel. While the caramel may not be hissing or making any noise, it’s very hot and I’ve seen people dip their finger in to give it a taste. Don’t taste the caramel until it’s cooled down.
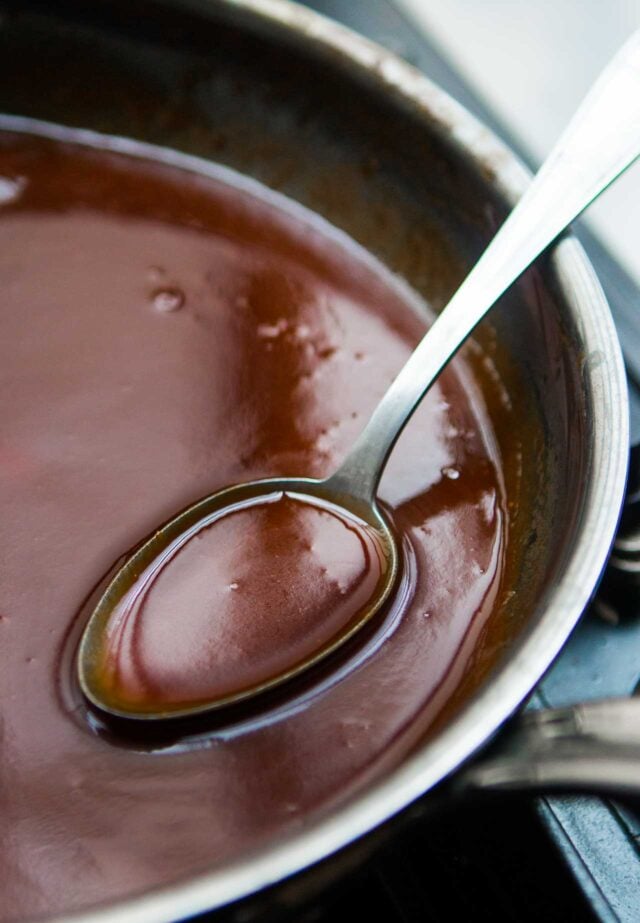
– Know when it’s done. Caramel is done when the color is a rich, reddish-brown, similar to the color of an old copper penny. Perfect caramel should be cooked just past the point where it starts to smoke. Some recipes advise cooking caramel until it starts to smoke—but that’s too soon. It will just be a few seconds after, but those extra moments give the caramel a slight edge that makes it less-sweet, and more flavorful. The picture at the top of the post of me pouring caramel is exactly the right color.
To get it right, I take a sniff once it begins to turn amber-colored and darkens. I keep a very close eye (and nose) on it and just after it smokes, but before it burns, that’s when it’s done. (To stop the caramel, do what the recipe advises. Generally, you either add liquid to it, or butter, or place the bottom of the pan in a basin of ice water.) If you screw it up, sugar is cheap so consider the loss an educational expense, and after you make caramel once or twice, you should get the hang of it.
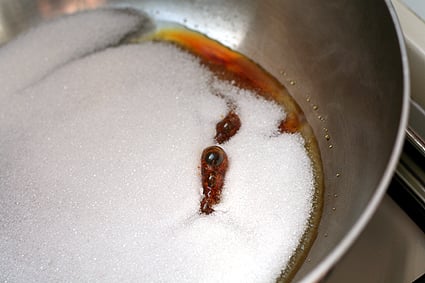
1. Start with an even layer of sugar in a heavy-duty pan, such as a deep skillet or wide saucepan.
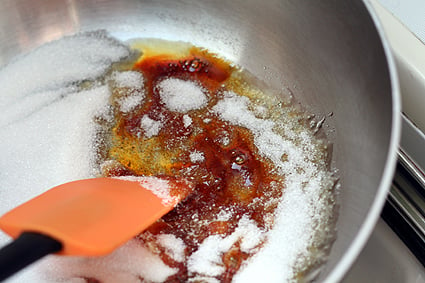
- Heat the sugar over moderate heat, keeping an eye on it. The main trick at this point is that sometimes it'll start burning in a spot beneath the surface, especially if the sugar is pretty deep. But in general, it should start to liquefy at the edge first with perhaps a few blips near the middle.
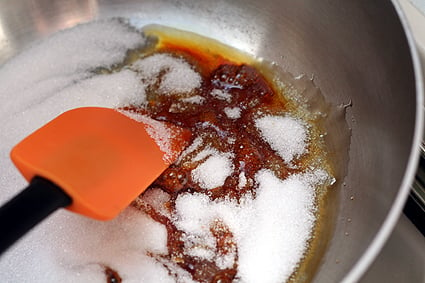
2. Cook the sugar over medium-high heat. Keep an eye on it and when you see it start to liquify tilt the pan to keep the sugar cooking evenly. You can also stir it if it threatens to burn in any particular spot, as it’s starting to do above. Once the caramel starts browning, very gently stir the sugar so it doesn’t burn in any places.
At this stage, it can quickly turn dark, so pay attention!
3. Your caramel may begin to get lumpy and grainy, but don’t worry. Just lower the heat and keep stirring. Any stubborn chunks should melt as you continue. If not, they can be strained out later and should be such a small quantity that they won’t likely affect the outcome of the recipe.
4. Uh…help! Ok, what happened below was it got stirred too much and the sugar lumped up before it had a chance to melt and liquefy. But all is not lost…
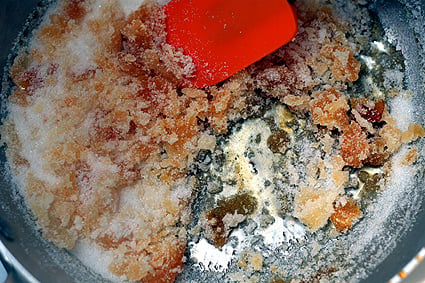
Continue cooking over very low heat, stirring gently.
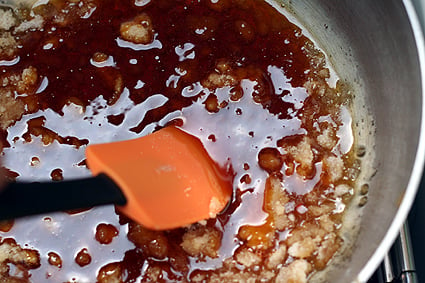
It will come right back to being smooth. Any stubborn bits can be strained out.
- At this point, if you’re using the caramel to line a mold, such as for a flan or crème caramel, immediately pour the caramel into the molds or ramekins.
- For making spun sugar, you should dunk the bottom of the pan in ice water to stop the cooking so it doesn’t continue to cook past the point of doneness. It’ll keep cooking once you take it off the heat, unless you ‘stop’ it somehow, or by adding something to it.
- If you’re stopping the caramel with something, such as cream or butter, add it right when the caramel reaches the desired color and depth-of-flavor. Warm cream will incorporate more smoothly into the hot caramel than cold cream.
- You can cheat and use straight caramel (with no cream or butter added) to top a solid custard to turn it into a crème brûlée by pouring a small amount over the custard, turning it to create a thin layer, and letting it cool at room temperature. Don’t refrigerate them or you’ll risk them becoming soggy.
- Make an easy praline by adding an equal amount of toasted nuts (equal to the sugar by weight or volume) during the last moment. Stir them in quickly with a bit of salt, then pour the mixture on a lightly greased baking sheet. Once cool, crush and fold into ice cream, scatter over desserts, or enjoy as candy.
Related Recipes
